A monopod is one of those pieces of gear that looks optional until you spend two hours holding a long lens at a school soccer game.
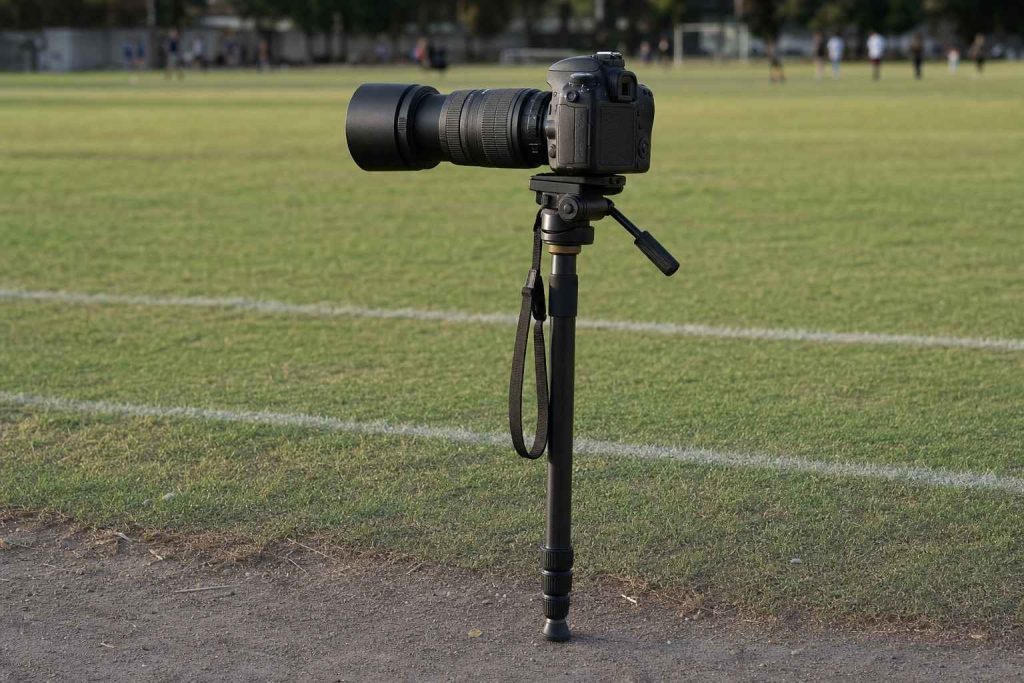
A monopod is a single-leg support that takes the weight of a heavy telephoto and steadies your shots. It extends to eye level, plants on the ground, and lets you lean the camera weight onto it rather than your arms.
It is not a tripod. It has one leg, not three, which is the whole point when you are shooting sport.
Who actually needs one
Not everyone who shows up on a sideline needs a monopod.
If you shoot on a phone or a kit zoom, you can skip this page. A monopod is built around the problem of a heavy telephoto lens, and if you are not carrying one, the problem does not apply. The overall gear picture for shooting your kid’s games covers what matters first.
Two situations shift the calculation:
- You are carrying a long telephoto in the 70 to 200mm or 100 to 400mm range, and you are shooting for a full game, not just a few minutes on the sideline.
- You are shooting in a dim indoor gym where slower shutter speeds are unavoidable and every bit of stability matters.
In either case, a monopod does real work. Outside of them, it is an extra thing to carry.
The two things a monopod actually fixes
Arm fatigue over a full game
A telephoto zoom on an entry-level mirrorless body can easily weigh two to three pounds. That is light until you hold it up at eye level for an hour and a half.
By the second half of a long game, arms get tired and tired arms mean camera shake. A monopod takes most of the weight so your hold stays steady from first whistle to last.
This matters more than people expect. The first few minutes of a game feel easy. The end of it is where the keepers are hardest to get.
Sharper frames, especially at long focal lengths
Camera shake multiplies with focal length. At 200mm, a wobble that would be invisible at 50mm becomes visible blur.
At focal lengths over 150mm and any shutter speed under 1/500, shake is a real problem. A monopod cuts that shake so more frames come out sharp, not just the lucky ones.
In a gym, where shutter speed drops and you are often pushing 1/250 or 1/320 to keep ISO manageable, the stability gain is the difference between a usable frame and a blurry one.
Why not just use a tripod

A tripod would give you even more stability. The problem is how sport moves.
Play does not stay in one spot, and a tripod does not let you follow it. Locking down a tripod on a sideline means the moment the action shifts twenty feet left, your whole setup needs to move with it. By the time you get there, the shot is gone.
A monopod lets you pan and track smoothly with the action while still supporting the lens weight. You can swing it left, step forward, or pivot quickly without collapsing and re-extending three legs.
For sports, speed matters as much as stability. A monopod is the one that gives you both.
On a tripod, you photograph the field. On a monopod, you photograph the play.
How to use a monopod on the sideline
The technique is straightforward. A few habits make the difference.
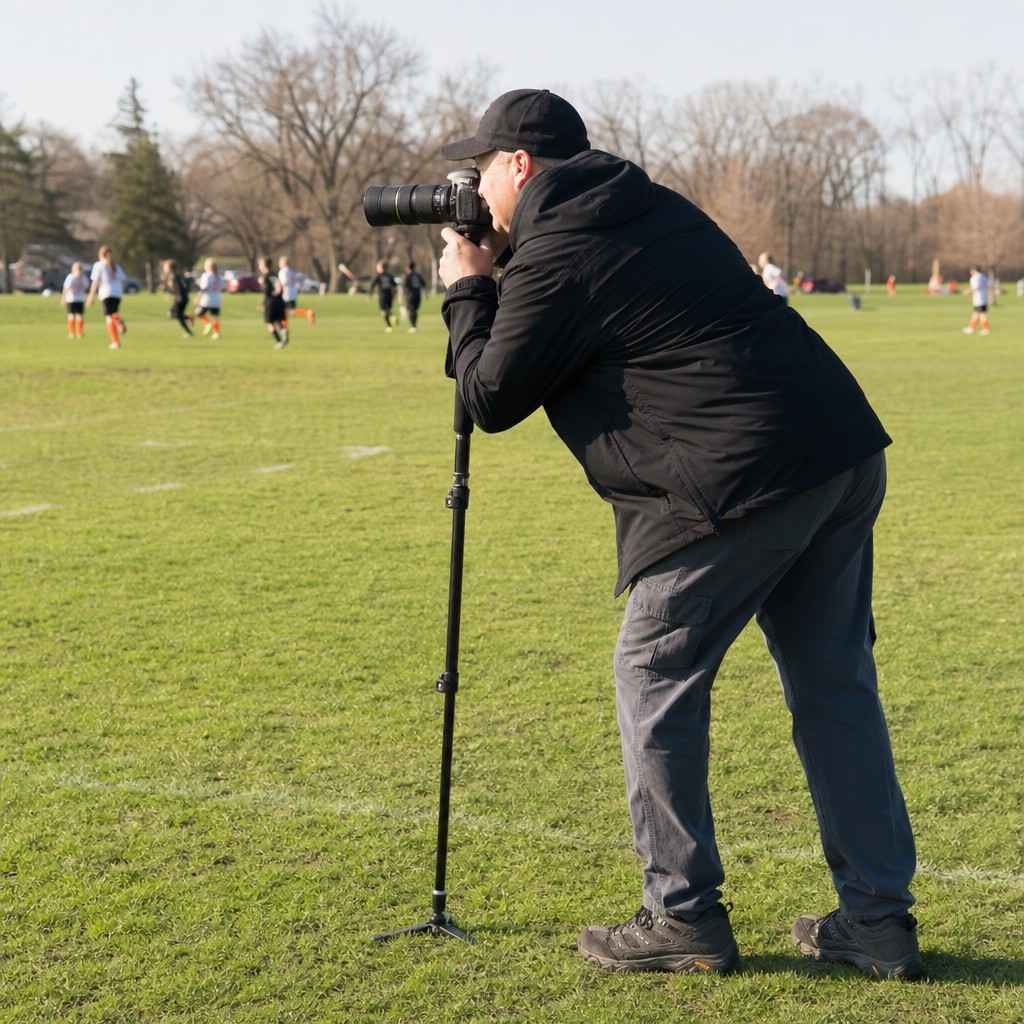
Extend the monopod so the camera sits at your natural eye level when you are standing in your shooting stance. Adjust the height before the game, not during it.
Plant the foot of the monopod slightly in front of you, then lean the camera weight forward onto it. Your job is to guide the camera, not hold it up. Keep one hand on the lens barrel to control the panning movement, not just the camera grip.
When panning smoothly with the action, rotate from your hips, not your shoulders. The monopod acts as a pivot point. Start tracking the player before the peak of the play and hold through after it.
- Extend to eye level first. Shooting hunched over for an hour is worse than the camera shake.
- Plant and lean forward. Put the weight on the monopod, not your wrists.
- Keep one hand on the lens. It controls the pan and adds stability.
- Track through the play. Start early, hold through the peak, keep following.
What to look for when choosing one
This is where most parents get lost, because the market is full of options.
The four things that matter for sideline shooting:
-
Height. Fully extended, the top of the monopod should reach a few inches below your camera mount position so the camera sits at eye level. Check the maximum extended height before you buy.
-
Load rating. The manufacturer lists a maximum weight capacity. Your lens plus camera body should sit comfortably below that rating. If the combined weight is close to the limit, the monopod will flex under load.
-
Lock type. Flip locks (lever locks) are faster than twist locks in cold weather or with gloves on. For sideline use, a quick flip-lock saves time when you adjust mid-game.
-
Grip comfort. You will hold this thing for a long time. A foam or rubber grip section makes a difference over a full game.
You can compare camera monopods on Amazon to see what the height, load rating, and lock type look like at different price points.
Sport-Phot earns a small commission from qualifying Amazon purchases, at no cost to you.
A mid-range monopod from a recognized brand will outlast several seasons of sideline use. There is no need to buy the most expensive option, but an extremely cheap one may flex or slip under load.
Is it worth it for you
The honest answer is: it depends on your lens.
If you are shooting with a heavy telephoto lens and planning to cover full games, a monopod pays off quickly. Arms tire, shutter speeds push lower in gym light, and a few dollars of aluminum turns borderline frames into keepers.
If you are shooting with a phone or a kit lens at outdoor daylight games, hold off. The benefit is real but the problem it solves does not apply yet.
Get the lens right first. Then a monopod becomes one of the more straightforward additions to your sideline kit.