
Rink photos tend to fool parents twice. The ice glows, the overhead lights are powerful, and the whole arena feels bright.
Then the photos come out dark, blurry, and blue.
The rink is really a dim-room problem with two extras layered on top: you are shooting through plexiglass, and all that white ice is actively working against your exposure.
Hockey moves faster than almost any other youth sport, which means the shutter speed that works in a gym will not cut it here.
The two things that make a rink harder than a gym
If you have already wrestled with shooting indoor sports in a dim gym, most of the logic carries over. Same dim light, same high-ISO approach, same fast shutter priority.
But the rink adds two problems a gym does not have.
First, the glass. You are almost always shooting through the boards. A smudged or scratched section of plexiglass catches the arena light and scatters it across your frame.
Second, the ice. All that white surface reflects back toward the camera. Auto metering reads “bright scene” and underexposes, which leaves the players dark.
Both problems are fixable before the puck drops.
Go faster on the shutter than you think
A skater at full speed moves faster than a running basketball player.
A slapshot happens in a fraction of a second.
- 1/1000 second is the target for skating action and any puck play near the boards.
- 1/640 is the floor, and only when the rink is too dark to hold 1/1000 even at high ISO.
Set shutter priority (S on most cameras, Tv on Canon), dial in 1/1000, and leave it there.
The rink will not slow down for you.
Speed on the ice is the reason blurry hockey photos stay blurry: 1/500 second that works fine for a layup turns a skating stride into smeared equipment.
Push the sensitivity high without worry
Rinks are dim rooms. The bright-looking ice does not translate into usable light for the camera.
Set ISO to 3200 and expect to push it to 6400 before the game is over, especially for the far end of the rink.
The same rule that applies in any gym applies here: a sharp photo with grain is a keeper; a blur is not. Grain at ISO 6400 is barely visible on a phone screen or a modest print. Blur never gets better.
Fix the exposure trap before the game starts
This is the step most rink parents miss, and it makes the biggest difference in face quality.
Auto metering reads the bright ice and underexposes the photo. The camera thinks it is looking at a bright scene, so it holds back the exposure. The ice looks fine. The players go dark.
The fix is exposure compensation, dialed up about one stop. On most cameras this is a button or dial marked with a plus and minus symbol. Set it to +1 and take a test frame. Faces should look natural, not washed-out or dim.
- +1 stop is a starting point. Check a test frame and adjust.
- If faces still look dark, try +1.3 or +1.7.
- If the ice is blowing out completely, pull it back.
On a phone, tap your subject, then slide the exposure sun icon upward until the face looks right.
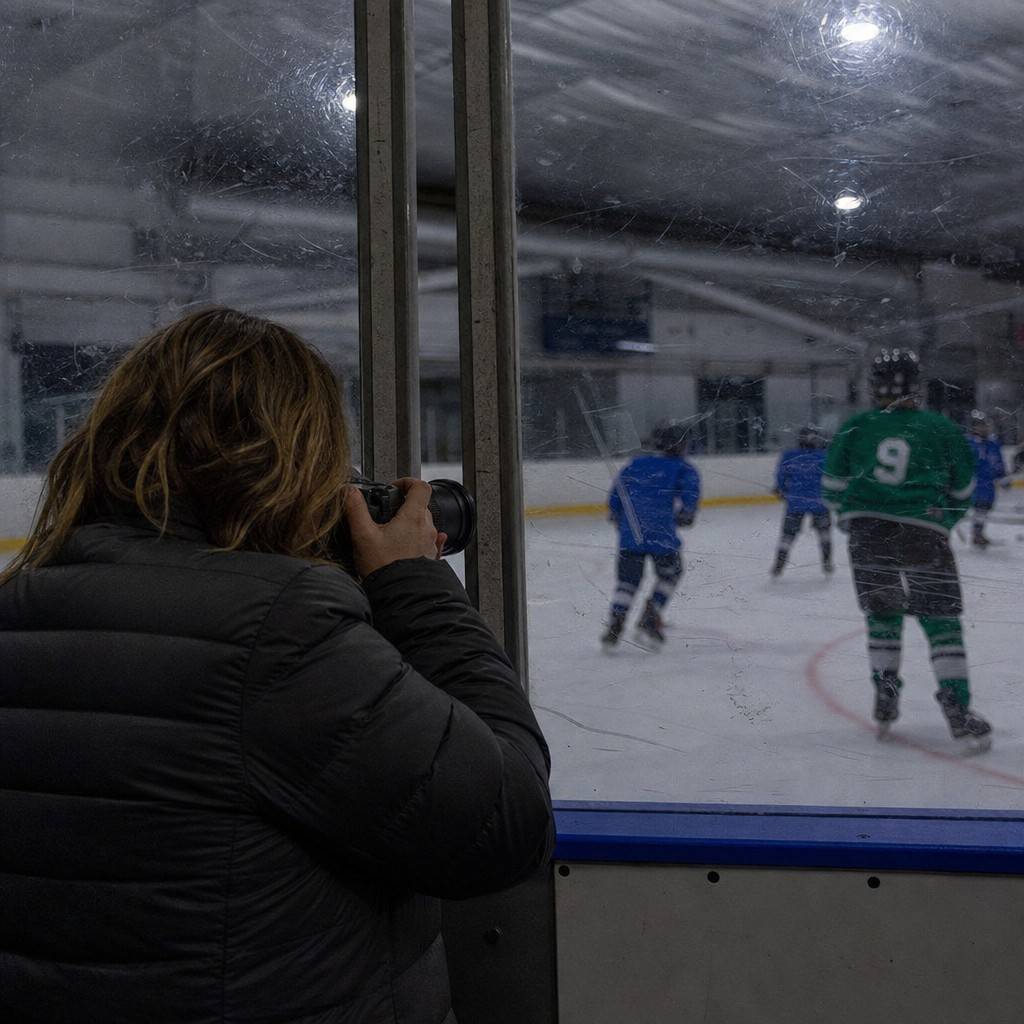
Shooting through the glass
Most rink seating puts you behind the boards for the whole game. That glass is a photography problem, but a manageable one.
Press the lens directly against the plexiglass. Any gap between the lens and the glass lets the arena reflections show up in the frame as a smeared glow.
Find a clean section of glass before the game starts and claim it. Scratches and heavy smudges scatter light; a cleaner spot gives you a cleaner photo.
A wider aperture also helps. The lower the f-number on your lens, the more the glass surface goes out of focus. A kit lens at f/5.6 is not ideal here. If your lens allows f/2.8 or wider, use it.
If you are on a phone, press the lens flat against the glass and use burst mode. The glass problem does not go away entirely, but contact eliminates most of the reflection.
The rink usually casts everything blue
Rink lighting is often heavily blue or occasionally green. Auto white balance gets it wrong on a regular basis.
Set white balance manually before the game rather than fixing a color cast on every photo afterward.
- Try the fluorescent preset if the rink has typical overhead tubes.
- If the light looks tungsten-warm, try the tungsten or incandescent preset.
- Take one test frame, zoom in on a white jersey, and see if it actually looks white.
On a phone, look for a warmth slider in the camera’s settings or shoot, then correct with the warmth control in Photos or Lightroom Mobile.
Where to stand
Position matters as much as settings. The rink boards limit where you can go, but the best spots are consistent.
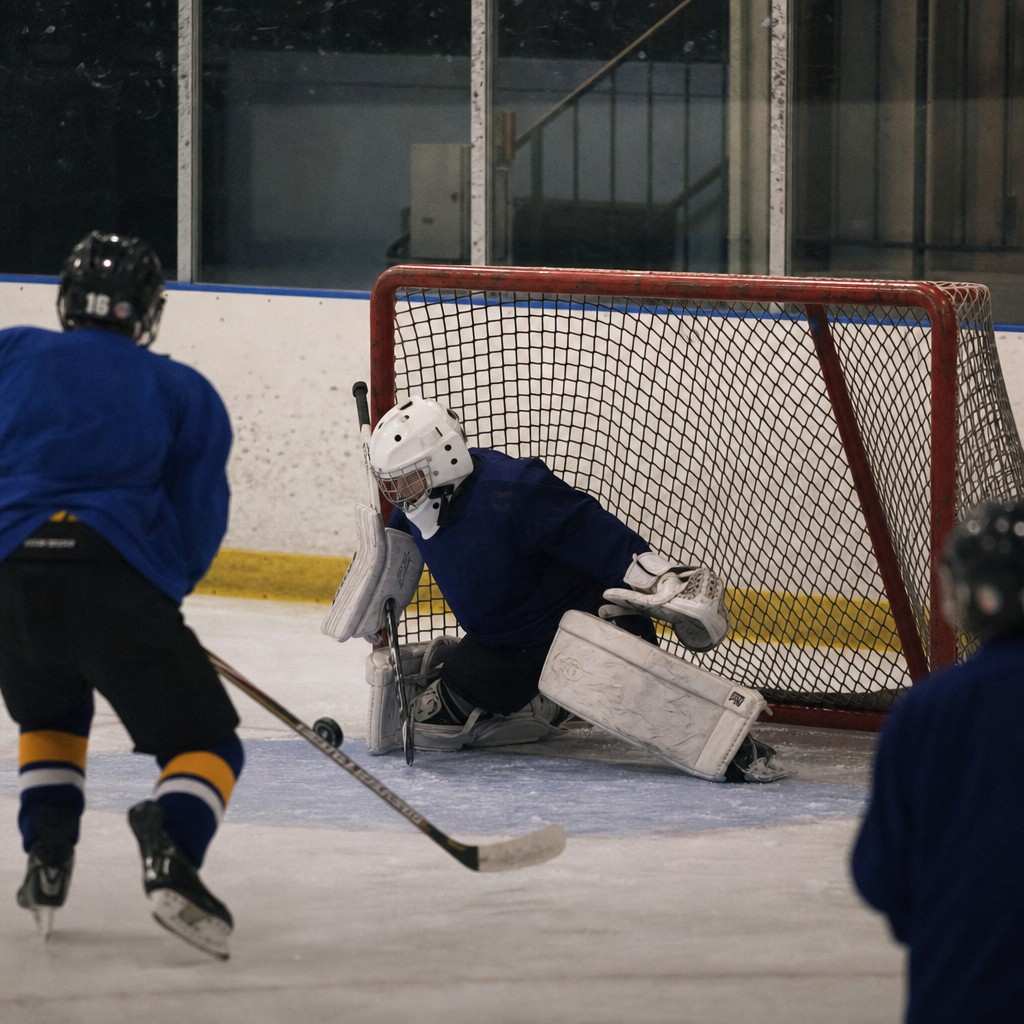
The corners and the area behind the goal are where the play turns toward you. A player cutting from the boards toward the net is coming at the camera, which means a more readable face and a tighter shooting angle.
- Behind the goal. Odd perspective, but when play clusters in front of the net, you are looking straight at the action.
- The corner boards. Forechecking and board battles are the rink’s closest-range action, and tracking a moving skater is easier when the play is moving toward you rather than across.
Avoid the center ice position for the whole game. It keeps you at a flat angle and far from the close-range moments that make a frame.
Burst through the big moments
The goal, the save, and the hit at the boards are over in half a second.
Hold the shutter down through the play, not just at the moment you think something will happen. Burst mode fires a run of frames, and the best image is somewhere inside that sequence. Set continuous autofocus (AF-C on most cameras, AI Servo on Canon) so the camera keeps tracking a moving skater through the burst.
This matters more in hockey than in most other sports.
A shot on goal begins and ends before your reflexes can time it. Burst catches it. A single tap of the shutter usually does not.
What to think about for showing speed
Panning turns a skating stride into a motion photo rather than a frozen one. Hold the shutter at 1/250, follow the skater across the frame as you fire, and the player stays relatively sharp while the ice and boards go streaky behind them.
It works occasionally and fails often, which is exactly what showing speed with a blurred background is like in any sport.
Try it when play is coasting, not during a scramble in front of the net.
If you are shooting with a phone
A phone at a rink is harder than most indoor sports. The dim light, the glass, and the speed stack up.
A phone still gets good frames at the right distance and the right moment. A few things help:
- Press the lens against a clean section of glass and hold it there.
- Tap and hold on your kid to lock focus and exposure before the play reaches you.
- Slide the exposure up (+1 stop equivalent) so the face does not go dark against the ice.
- Burst through the shot and the save. Hold the shutter button down.
Expect some frames to be unusable. Pick the sharp one, crop to the face, and do not hold the phone to an impossible standard in a rink. A camera with a lens suited to kids’ sports in low light makes a bigger difference here than in almost any other setting.
Before the game starts
Set these once in the parking lot and leave them:
- Mode: shutter priority (S or Tv)
- Shutter: 1/1000, or 1/640 if the rink is very dim
- ISO: 3200 to 6400, or auto ISO with a minimum of 3200
- Aperture: the lowest f-number your lens allows
- Exposure compensation: +1 stop to start; adjust after one test frame
- White balance: fluorescent or tungsten preset (not auto)
- Flash: off
- Focus mode: continuous (AF-C or AI Servo)
- Drive: burst
- Position: corner boards or behind the goal, lens against a clean section of glass
The rink looks like it should be easy and then surprises almost every first-time parent. One pregame setup run removes most of the surprises before the puck drops.