A track meet is one of the more forgiving venues for parents with a phone or a basic camera.
Outdoor daylight does the hard work on shutter speed for you. Unlike a dark gym, you are not fighting for light.
The challenge here is something different: a track meet runs five or ten events at once, spread across a big facility, and your kid’s race lasts maybe thirty seconds.
The parents who come away with good shots are the ones who pick a spot and commit to it before the gun goes off.
Shutter speed for sprints and jumps
Daylight is generous, but speed matters here more than almost any other outdoor sport.
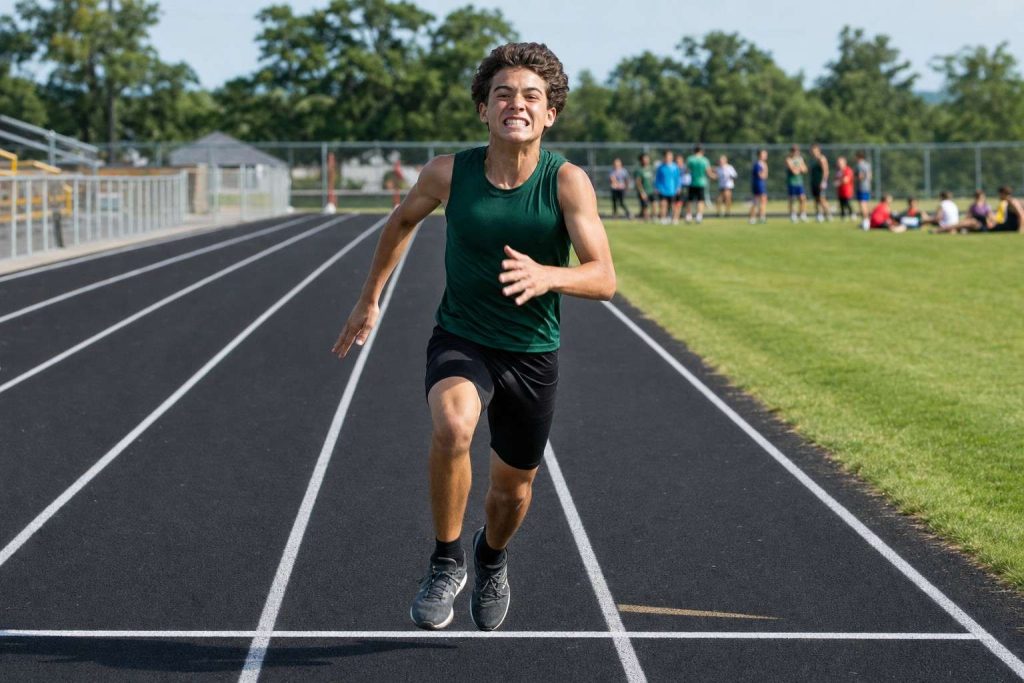
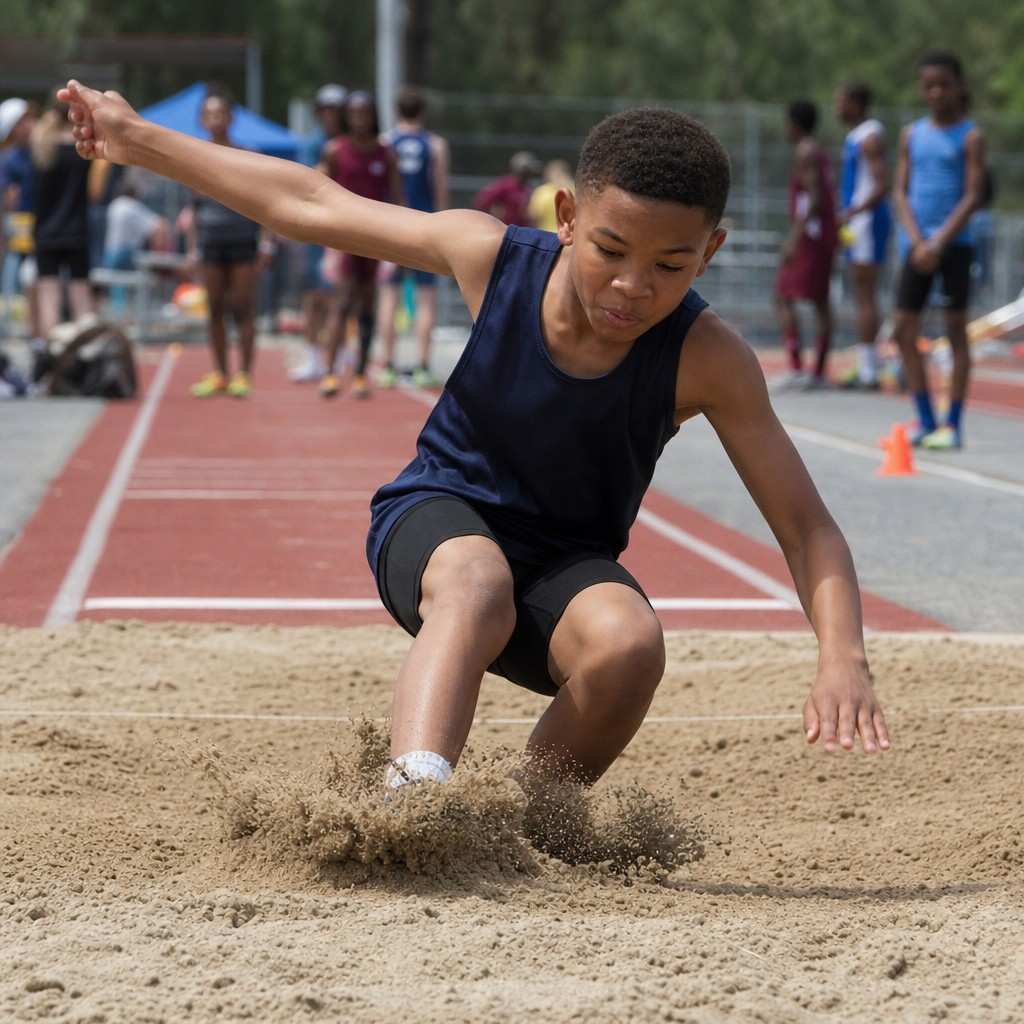
A sprinter at full pace needs 1/1000 second to freeze cleanly. At anything slower, the limbs smear. For the long jump or high jump, that same 1/1000 captures the body at full extension without any soft edges.
- 1/1000 second for sprints, hurdles, and any jump at the peak.
- 1/500 second is the floor for slower moments like the windup before a discus throw or a distance runner mid-pack.
Set shutter priority mode (marked S on most cameras, Tv on Canon). You dial in 1/1000, the camera handles the exposure. Leave it there for the whole meet.
The reach problem at track meets
A track is big. Events on the far side or across the infield are not going to look like much from where you are standing.
A telephoto lens closes the distance from the far lane. Something in the 70 to 200mm or 55 to 250mm range fills the frame well from the near side.
It still reaches the infield events with room to spare.
If you are on a phone, you do not have that optical reach. The answer is to move.
Pick one event and get as close to it as the facility allows. A phone shot of the long jump pit from three feet away beats a distant crop of a sprint you watched from across the track.
Where to stand for each event
This is the most useful thing to think about before the meet starts.
Different events have completely different best angles. You can only be in one place at a time.
Settle on where your kid’s main event puts you, and get there early.
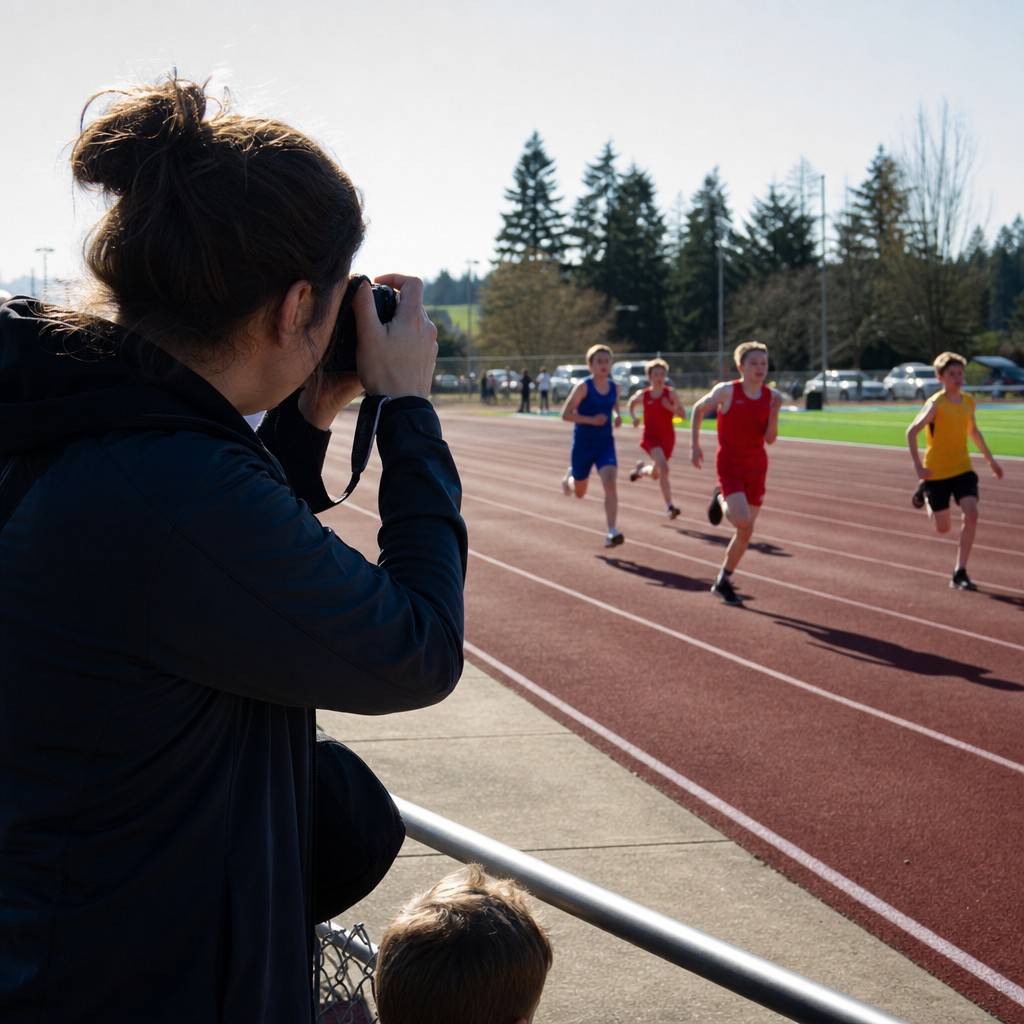
The finish line is the place for sprint events. Runners come straight at you, faces forward, and the lean across the line is the shot everyone wants.
The landing pit is where long jump shots happen. Stand at the side so you see the body in the air and the feet at contact.
From the end of the pit, you mostly see a back.
Level with the bar is the right spot for high jump. You see the full arc of the body over the crossbar.
That is the only angle where the jump reads clearly as a jump.
The inside of a curve works well for distance running. Runners are turning toward you and the pack compresses into the frame.
Mid-straight positions give you a long sequence of people running sideways, which is harder to time.
Get to the right spot on the sideline before you worry about settings.
Pick one event per session
Track meets are spread out and fast-moving.
Trying to follow every event leaves you running between spots and missing all of them.
Find where your kid competes, get there early, and photograph that event properly.
If your kid competes in two events, decide which one you want the better photos from and give that event your full attention.
The alternative is a lot of blurry, small, far-away shots of your child’s back at six different events.
Panning for speed
Most parents shoot static: point, focus, fire. That is the right call for jumps and field events.
For a sprinter, there is an option worth trying. Panning lets you follow the runner with the camera at a slightly slower shutter, which blurs the background and shows speed.
The runner stays sharp while the track and crowd streak past. It takes a few tries, but the result looks more dynamic than a static freeze.
If you want to try it, the full technique for showing speed with a blurred background walks through how to do it.
For most parents at a track meet, start with 1/1000 static first. Get consistent sharp shots, then experiment.
Sun position and burst technique
The same sun rule that applies to any outdoor sport applies here. Shoot with the sun behind your shoulder so the light falls on your kid’s face, not into your lens.
At a track meet this limits where you can stand, but it is worth walking around the track to find the better side if the sun is directly in your face.
Burst through the peak moment. A jump reaches its peak and falls away in under a second. Burst fires a sequence and gives you the frame where the body is fully extended.
For a sprint finish, start bursting from about five runners’ lengths out and hold through the line.
Set your focus to continuous autofocus mode to keep a moving runner sharp through the whole sequence (AF-C on most cameras, AI Servo on Canon).
Point at your kid, half-press to lock on, and hold through the run.
Phone tips for the track
On a phone, proximity is everything. Pick one event, get close, and work it well rather than trying to cover the whole meet.
- Tap and hold on your kid to lock focus and exposure before the play reaches you.
- Hold the shutter button to burst through the key moment, then pick the best frame.
- Avoid the far side of the track and far infield events. Digital zoom at distance produces a muddy crop, not a real photo.
For events you cannot physically get close to, the general approach for outdoor field sports covers what to do when distance is the main obstacle.
Quick setup before the meet
Set this before your kid’s first event:
- Mode: shutter priority (S or Tv)
- Shutter speed: 1/1000 second (1/500 floor for slower plays)
- Focus mode: continuous (AF-C or AI Servo)
- Drive: burst mode
- Sun check: sun behind your shoulder
- Position: at the finish line, landing pit, or inside of a curve depending on the event
- Phone: move close to one event, tap-hold to lock focus, burst through the moment
A track meet rewards parents who plan their spot. Pick the event, find the angle, and get there before the start. The actual shooting is the easy part once you are standing in the right place.